In this article we’ll show how we use Bytes Route tours in your very own web-app.
For more info on tour building, you can also check the documentation: Tour Creation
What tour type should I use?
UX is hard. You try your best to get the best design in front of your users but it is never enough. The more users you have the more problems (opportunities to improve) you start noticing.
One of the best places to look for problems is in the conversations your support team has with customers. That is how we noticed that an action that we considered to be so simple, still confused some of our customers and required further explanation.
Scalable solutions for repetitive questions are the only solution, i.e. if you want your support team to service more and more users with the same number of employees. The moment we noticed a constant percentage of our users asked how they can delete a tour from the dashboard we initiated two actions:
- We started working on a redesign (to try and make things more intuitive)
- We created a Bytes Route tour to complement this and provide further assistance on this issue. This would enable our users to help themselves.
For our tour, we decided Helper Tour type is the best fit. The choice was made because it would contain more than one step to show the process, so it wouldn’t be just a Tooltip Tour, and it also won’t be onboarding users to qualify for the Onboarding Tour
Building
We can now proceed to the Tour Building phase. We will choose the dashboard as the starting page since it’s a dashboard-related issue. Users who face this issue are most likely to already be on this page when encountering the problem.
The actual steps that the users would have to perform to delete a tour from the dashboard are:
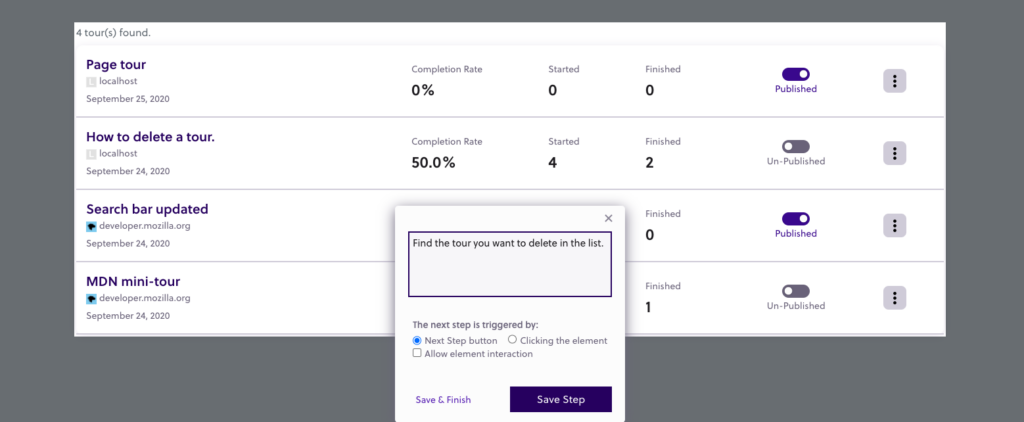
- Find the tour you want to delete in the list of tours.
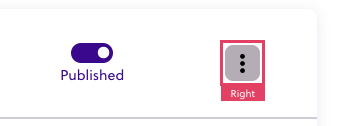
- Click the options menu (square button with 3 dots)
- Click the delete button from the contextual menu.
What we should now do, is select the appropriate elements on the page and add the appropriate texts to each.
Let’s start the building process by opening the extension and press Start Recording.
Step 1
The first step explains to users that they should search for the tour to delete in the list of tours. Using the anchor selector, we will select the container that represents the list of tours for this step and right-click it.
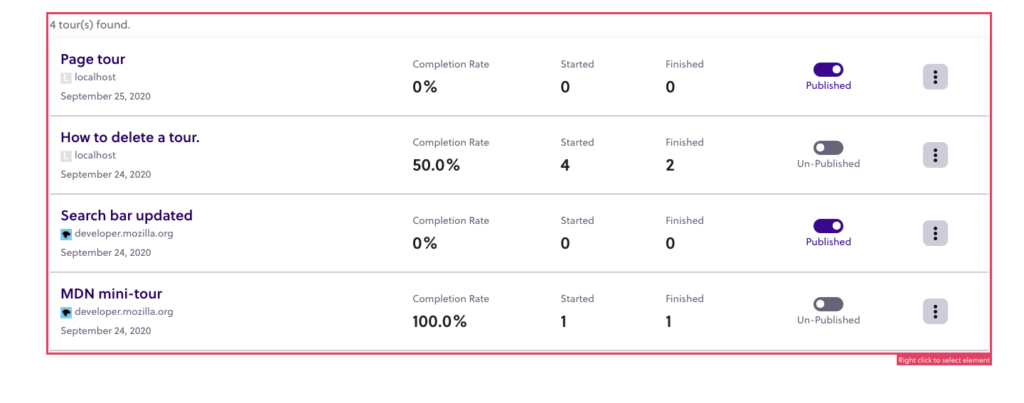
Right-clicking an element, will bring forward the Step editor, in which we will add the text: “Find the tour you want to delete in the list”. For the navigation, we will choose the Next step button, as this step is just an indicator of the zone where the users will have to search for the item they wish to delete.
Step 2
The second step involves showing users how to access the options menu. Since we won’t actually delete a specific tour, we will showcase the actions leading up to the deletion on the first tour in the list. With the anchor selector, we will select the 3-dots options menu.
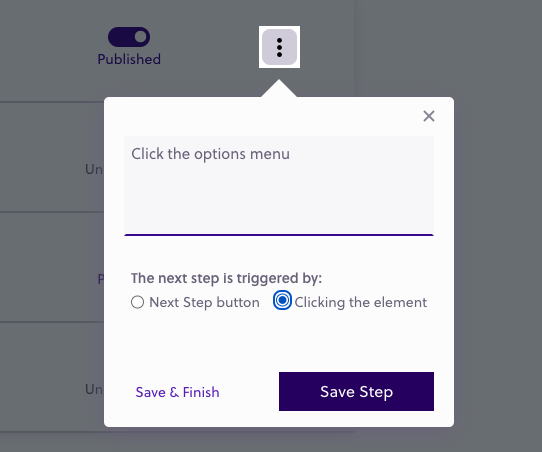
In the step-creator, we will add the description: “Click the options menu”. For navigation to the next step, we will choose navigation by clicking the element. For this step we want users to click the button to move forward to the next step. This will make them better remember the action, rather than just reading about it.
Step 3
The final step involves teaching users to click the delete button. For Bytes Route, we know beforehand that this action isn’t destructive, since it’s also followed by a confirmation dialogue, so, in this case, we can actually make the user click the button in order to learn the process.
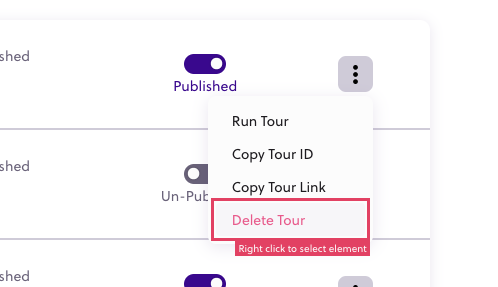
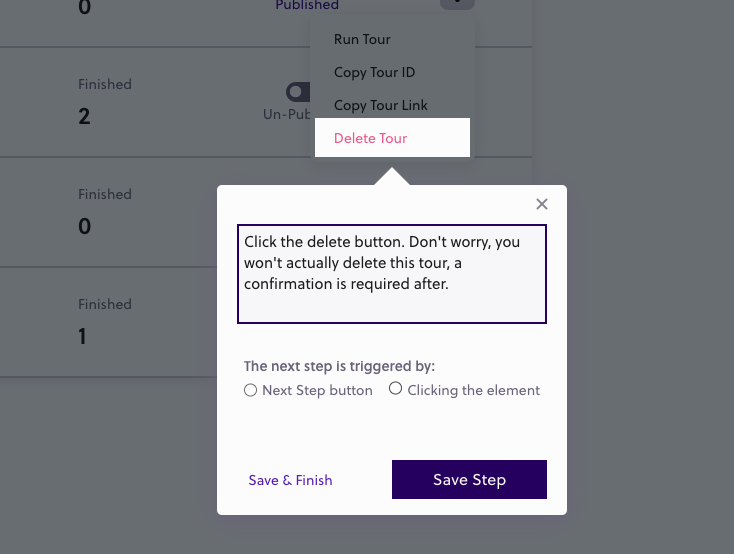
In order to reassure users that no destructive process will occur, we can include it in the step description: “Click the delete button. Don’t worry, you won’t actually delete this tour, a confirmation is required after”.
For the navigation option, we will choose click-element since we also want to teach users the action for this step.
Tour finalization
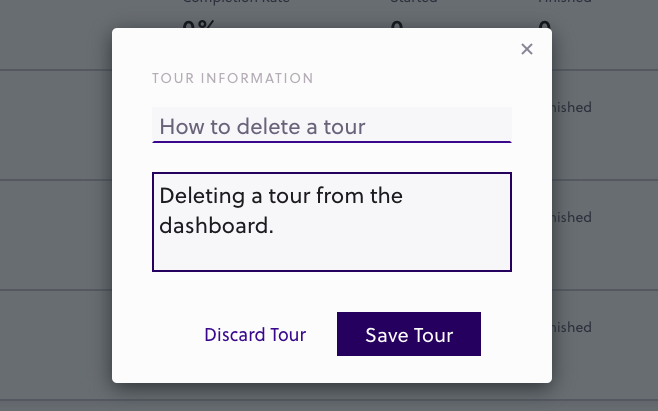
To finalize the step adding process, we have 2 options: either press Save & finish on the last step or, if you pressed Save Step on the last one and you wish to end the tour, you can do so, from the extension, by pressing Finish. Either of these options will bring forward the Step Finalize pop-up.
In the Tour finalization pop-up, we can enter the final details for the tour, a title: “How to delete at tour” and an optional description: “Deleting a tour from the dashboard”.
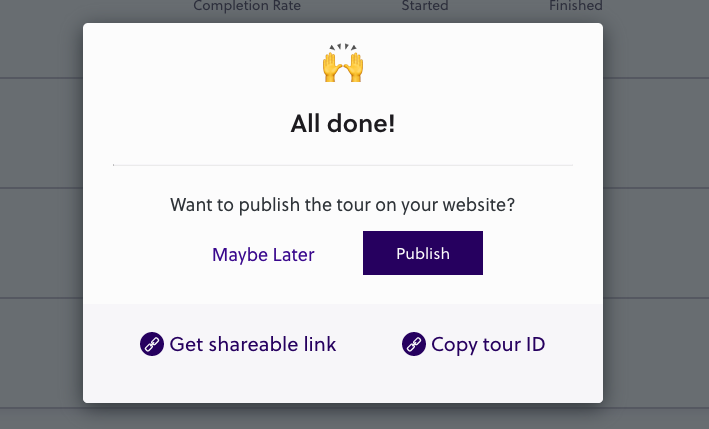
Pressing [Save Tour] in this window will prompt us with the final pop-up, the Tour summary. From this, we can test and Edit the Tour.
The result
We find our newly created tour in the extension list . Hover it and press the Play button to run it.
If you notice some mistakes or things you would like to change, you can still edit the tour. When you are pleased with the result, feel free to hit the Publish button, either in the extension or the Dashboard and it will go live for other users.
It’s assumed that you have already created an account, hooked the script from the dashboard, and redeployed your website.

