There are two ways for WordPress users to insert code in their websites or web applications.
- Using a plugin
- Manual installation
1. Using a plugin
The most convenient way for users to insert code into the WordPress header and footer is to use a plugin. The advantages of using a plugin over the manual installation are:
- When you switch themes, your code snippets remain intact.
- With the plugin, you can quickly and easily add code snippets to your webpage header or footer.
- It’s easier to use because the plugin does not require any programming knowledge.
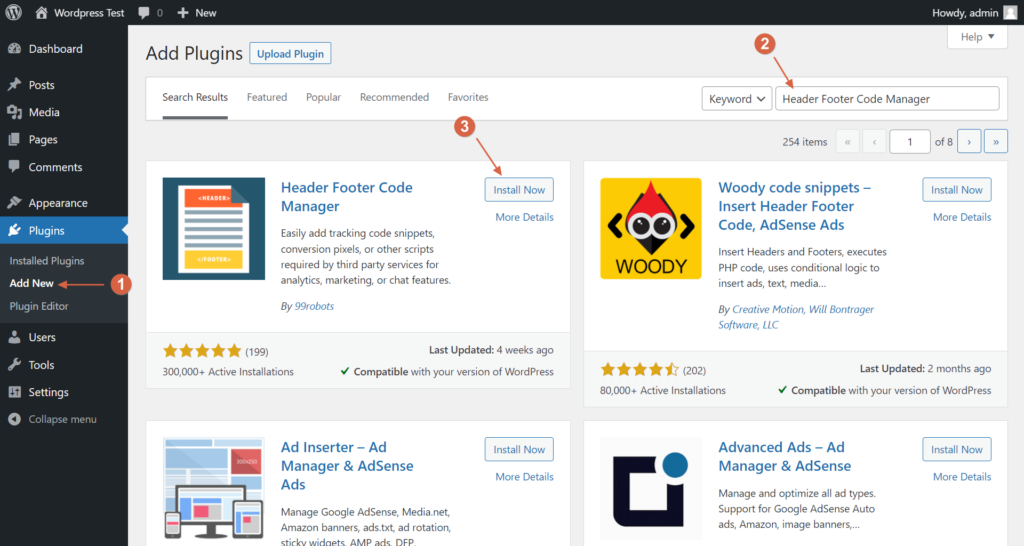
Step 1: Install and Activate Plugin: Header Footer Code Manager
Header Footer Code Manager is a free WordPress plugin that you can install and activate right from your dashboard by heading to Plugins → Add New, searching for it, clicking “Install Now” → “Activate”:

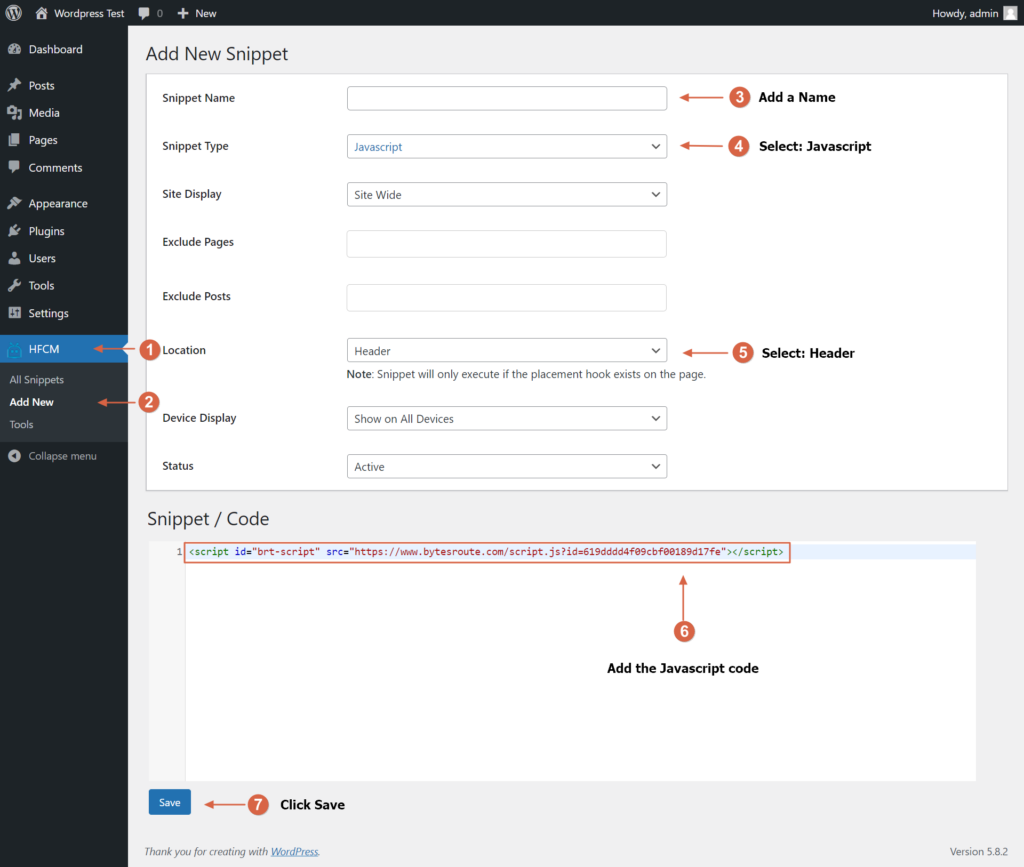
Step 2: Add the Bytes Route code snippet to the Header Footer Code Manager (HFCM)
Once you activate the plugin, you can access its interface by going to HFCM → Add New:

To add code to your site’s header, you need to paste it into one of the boxes under the Snippet / Code area:
- Side Wide – adds the code snippet to the header of every single page on your site. This is what you’ll want to use most of the time.
- Show on all Devices – adds the code snippet to desktop and mobile devices.
2. Manual installation
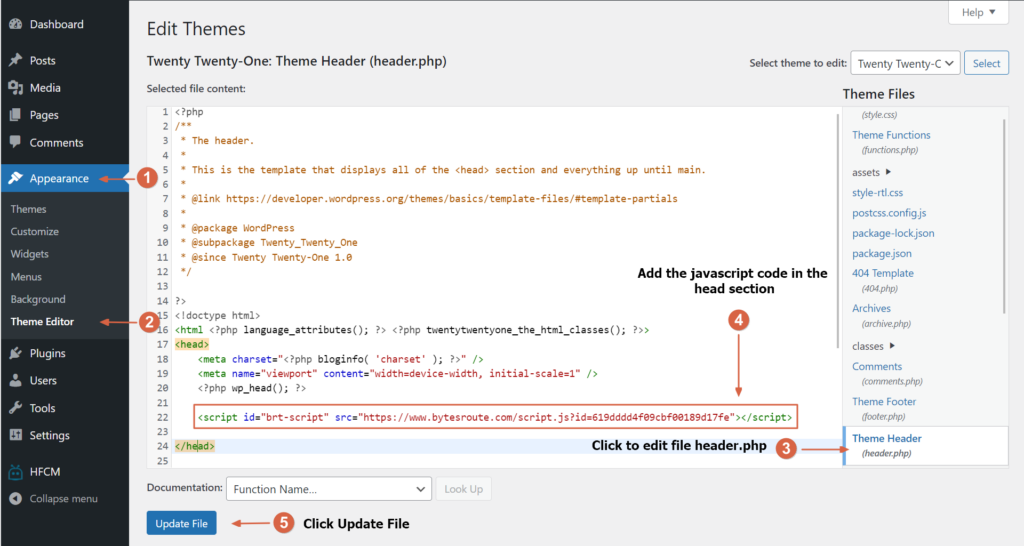
The javascript code can be added by going to Appearance → Theme Editor:
- Select the file “header.php” on the right side of the current view.
- For the header, insert the codes between the tags <head> and </head>.
- In case there are more HTML <script> tags, insert the Bytes Route code snippet as the last script. This will ensure that the Bytes Route script will load after all the information on the web application load.
- Finally, click the “Update File” button to save the changes to your website with the added code snippets.
